


Create and Manage Security Groups
You can create new security groups to provide certain servers with specific access. After login with the user credential, follow the steps:
-
- From the left menu bar, select Project→Network→Security Groups and then click “Create Security Group”.
- Determine a unique meaningful name (Ex. Goenet) and an optional description then click “Create Security Group”.
Once the security group has been created successfully, it will be shown in the list with an option to manage its security rules.
Manage Security Rules
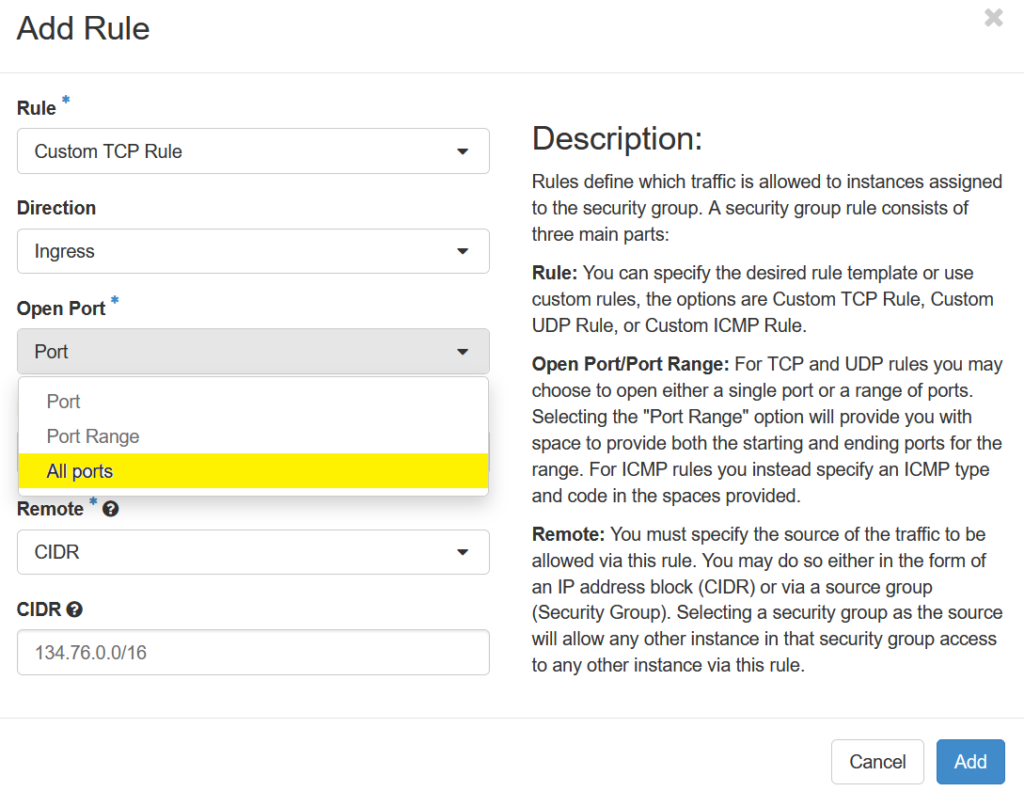
You can add/remove security rules to/from a security group, in order to change the provided access. Click “Manage Rules” from the very right of the security group row. A form containing all defined rules will be shown. By default, all ports are opened for outbound connections and no inbound connections are allowed. As a result, you can see that it contains 2 Egress rules whit no limitation on IPs and ports.
-
- To add a new rule, click “Add Rule” on top-right of the form.
- To define Goenet rule, first select TCP protocol from “Rule” drop-down list.
- Leave the “Direction” field with the value Ingress (inbound connections).
- For TCP protocol select All ports from “Open Ports” drop-down list.
- Leave the “Remote” field with the value CIDR, and in “CIDR” field specify the GWDG/University’s IP range: 134.76.0.0/16. The default value “0.0.0.0/0” means from any IP (no protection) .
- Then click “Add” on bottom-right of the form.
Assign Security Group to Server
From the left menu bar, select Project → Compute → Instances and then click the small arrow on the very right of each instance row called “Actions”. After that select “Edit Security Groups” then click the “+” (add sign) of “Goenet” from Security Groups list. Then click “Save” on bottom-right of the form to apply the rules on the server.